Showing posts with label not disappointing. Show all posts

Friday, January 16, 2015

Review: Sally Hansen Gel Nail Strips in Perfect Poison

When I get paid, I find it extraordinarily hard not to just blow money on toys.  Preferably nail toys.  Because that way I can justify it as being for my blog!  Anyway, I've been looking at the Sally Hansen Gel Nail Strips for a while now and when there were on sale at Shoppers the other day, I couldn't resist.  Full disclosure: I tried these around Christmas just gone and they didn't even last a full day.  I had a feeling I did it wrong - I was in a hotel room without all my supplies - so I thought I'd give it another chance, with some fancier nail polish strips, this time in Perfect Poison.  I'm actually going to do this: there's a twist to these pictures...


I had a hunch that my problems last time were a combination of not cleaning my nails well enough before I applied the strips, and that I didn't apply the gel top coat properly.  This time, I followed the instructions, using acetone to remove my previous polish, then the alcohol wipes to remove every bit of residue, ick, whatever.  I think this is the most important step.  Next, I chose each strip to match each nail and applied them, as I would normally with the Sally Hansen Strips.  I paid close attention to rubbing each strip with my finger, heating it up a bit with friction and making sure there were no gaps, no bubbles (heheheh nearly typed buttles.  Butts, hehheheh), and making sure that each edge was folded down and slowly filed off.  This is not a fast process, it's best not to rush.  I then applied the gel top coat to one finger at a time, making sure I wrapped each tip, and covered the edges of the strips in gel without flooding my cuticles.  One go under the lamp for each nail, and another quick wipe off with a wipe and I was done.


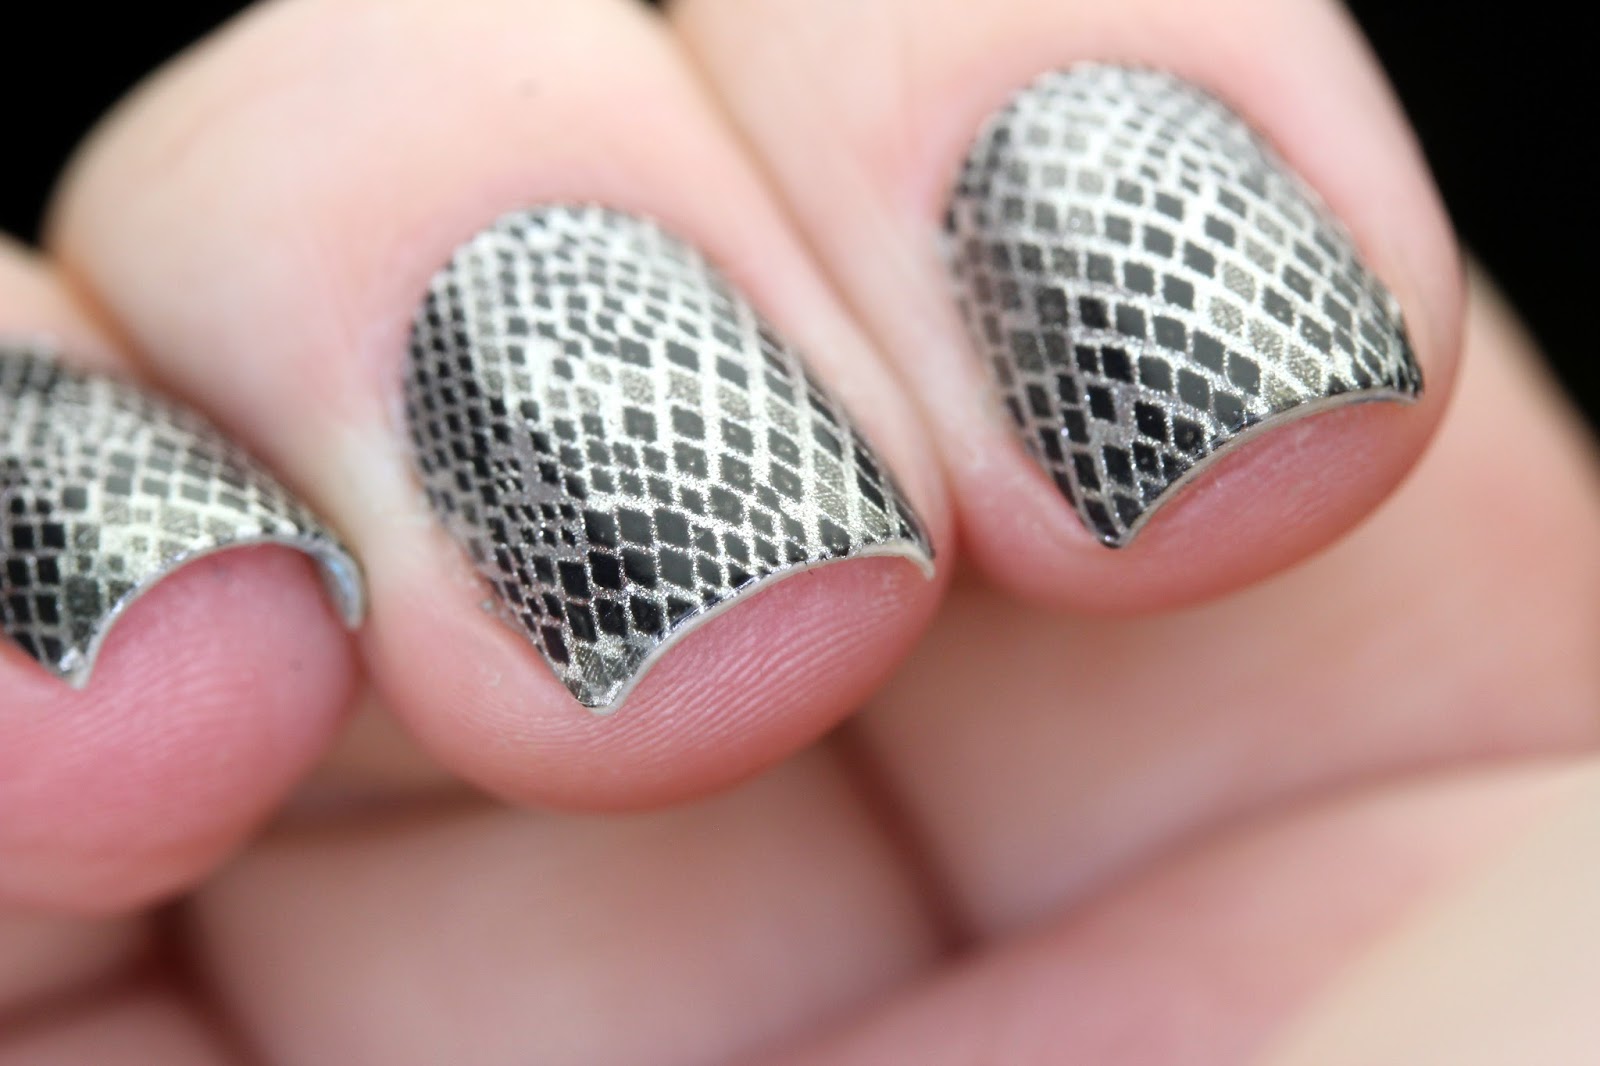
The Verdict:  You may be wondering what the twist is here.  Well, the twist is that I applied these Friday night and these photos were taken Sunday night.  I am extremely rough on my nails and I did dishes, cleaned, went about my life being rough on my nails and nothing happened to the strips.  No chips, no wear, nothing.  I only took it off because I wanted something else, no other reason.  I can fully see these lasting, like, a week, and that never happens.  I would completely recommend these, especially if you're rough on your nails and are prepared to just be careful with your application.  I've tried gel polish before and it's a pain because it goes everywhere and then is impossible to clean but look how good these look!

Yay!

Tried for Girly, Got Grungy with Color Club Halo Hues


Sometimes things done turn out how you planned.  I've been doing a lot of glitter lately so when I sat down to do a mani that wasn't glitter, I decided to follow suit with jessuhhkuh on Instagram and do a girly, soft rainbow mani with Color Club Halo Hues polishes.  I did that but instead of being flowery and soft it came out really grundy.  Turns out that's ok too!


My mistake here was using a black base.  I'm not really sure why I did that because I know that the Halo Hues polishes are opaque and really don't need a base colour to be holoy.  After applying two coats of Rimmel Black Satin I blobbed a small amout of a polish on to a piece of paper and used a small brush to apply a couple splotches onto each nail.  I kept going with each of the 2013 collection colours until the black was covered.  I added a little of the silver from last year for good measure.  This would have been ok had I not been over zealous in my cleaning and let so much black show around the  cuticle.  It was late so I just topped it with a top coat and called it a day.


The Verdict: This wasn't what I was aiming for but it looks kinda cool and is still super holoy so I'm cool with it.  And I found a way of making some of the holo show in my pictures which I'm also digging.  Turns out if I turn my lightbox off and just use my ring flash, I get this grungy style picture and holo.  So win!

Thursday, January 15, 2015

Review: OPI Push and Shove - Fussy but Awesome

This is weird, I think this might be like my first two-in-a-row swatch posts in forever!  I had things to say about the new Finger Paints flakies and I also have things to say about the new OPI Gwen Stefani chrome, Push and Shove.  And it's good things this time!  I'm really impressed with all the different polishes OPI has been coming out with lately - the Liquid Sands, the interesting glitters, etc - and Push and Shove is really interesting. 

I've seen quite a lot hate for Push and Shove, mostly for its ability to show every lump and bump on your nails.  You know what?  I don't care, because LOOK AT HOW REFLECTIVE THIS IS.  I can't be hating on it when OPI tries this hard, even including a special base coat.  Now, for full disclosure: I didn't use the Lay Down That Base base coat here.  I tried it, and it was pretty good.  Stunning from a distance but just ok up close.  I was doing some reading and saw someone layered it over Seche Vite and OMG the difference it makes is awesome.  It just gets super mirrory and awesome.  So, for best results, apply a base coat, a coat of Seche Vite and once that's all completely dry, just the one coat of Push and Shove.  It's really fussy and shows up the brush strokes if you do more than one coat and push the polish around too much.  


 The Verdict:  Sure, you can't use this polish exactly as directed, you can't use more than one coat, you can't push the polish around and the wear time isn't the best but somehow I'm ok with that.  OPI made a polish that's come the closest I've ever seen to a full mirror polish so who cares how that mirror is achieved.  My glitter mosaics never last that long and I spent hours on them.  Think of this as special occasion nails.   I mean, you can see my finger reflected on my thumb, for crying out loud!  KEEP DOING YOUR THING OPI.


XXX