Showing posts with label dots. Show all posts

Saturday, January 17, 2015

Brace Yourselves, This is a Bright One!

Hot damn am I glad that Valentine's Day is over and I can finally stop staring at the collection of pink and red polishes on my desk that I never used.  Sure, it's nice to have all the holidays be inspiration for manis but it gets a bit old after a while.  Now it's all over and done with for, what, a month til Easter, I just had to have a go at a fantastic neon mani I originally found on Pinterest: Sparrow Nails' combination of China Glaze Purple Panic and Turned Up Turquoise Neon.  It's too blindingly bright for me not to!

To start, I painted all but my ring finger in Purple Panic, leaving it to be Turned Up Turquoise.  Two coats is enough with these frosty neons, which is nice.  I added a coat of Seche Vite to each finger because I'm impatient and it makes the taping easier.  I then used my striping tape, painter's masking tape, pinking shears and dotting tools to make the various patterns.  Once they were all done, I finished off with another coat of Seche Vite and a coat of Essie Matte About You.  I've been looking for it for months and months, always missing it but TBBS in Toronto FINALLY had it in stock.  So everything will be matte now because it's the best matte top coat I've ever used.  I've tried Joe Fresh, Nails Inc, American Apparel, all of them can't even a bit compare to how good Matte About You is.  It's just such a matte finish!  Totes worth it.


The Verdict:  I love how abusively bright this is.  It was a pain in the bum to photograph, as you can imagine, but it was worth the effort.  I'm also going to go on again about how good Matte About You is.  Cos it's really good.  Yay neons!

Review: China Glaze Holographics in a Dot Gradient

Hello!  Again, not dead, just still trying to find time for getting home after work at like 7ish, going to the gym, making dinner, doing my nails, taking the photos, editing them and writing the post all in the one night.  I used to have a good system where I'd take the photos at night and write the post at lunch at work but damn my new socialable co-workers!

Anyway, like any person who ranks how awesome something is by how rainbow and/or sparkly it is, I was pretty damn excited to see the new China Glaze Holographic polishes show up at my local beauty supply place.  I mean, you all saw how great the OMG Collection was, right?  Yeah, this isn't that great.  Not by a long shot, especially with the stunning effort Color Club is putting into their new holographic polishes which I just found at the Winners on Spadina.  Run on sentences, hooray!  I very nearly bought all twelve of the China Glazes on the spot, thinking at the time that the fluorescent lighting in the store must be the reason they weren't that holo.  Nope, not the lighting... 


So having picked up Infra Red, Galactic Grey, Sci-Fly By, Strap on Your Moonboots and Take a Trek, I wanted to find a way to incorporate them into the one manicure.  Giving I'm a little short time these days, a dot gradient fit the bill perfectly.  I started with my usual two coats of Rimmel Black Satin then, using a smaller dotting tool, I did my dot rows, starting at the cuticle and working upwards.  I don't have the greatest lighting for holos - it's set up for smooth, even light - but there aren't rainbows.  All you see is the texture you get with these polishes and the teensiest hint of rainbow and that's it.  


The Verdict:  I was so excited about these polishes and they're just so not exciting in person.  I mean, they're still interesting polishes but compared to Color Club Halo Hues 1 and 2, well, it's not even a comparison.  You'll see.  I have the new Halo Hues and if it weren't for already having done the mani, I wouldn't even know the China Glaze existed.

Friday, January 16, 2015

Floss Gloss Party Bruise with Gold and Silver Holo Glitter Dots

I've just started at a new job and now I'm sure they don't mind sparkly nails and the word is out that my nails are usually not bad, I had to pull out all the stops and go mega sparkly.  I've been into gold and silver holo glitter lately so why not use them together over a dark grey-brown polish?


To start, I applied two coats of Floss Gloss Party Bruise, a dark grey-brown creme polish with a great name.  I've woken up with bruises this colour before.  Next, using my cheapest top coat, I went to work with my glitter using my usual technique.  This may look tricky to get spaced evenly but if you do a stripe down the middle of your nail and place them evenly, it's not too difficult to match the spacing as you fill out the sides. I like to add two coats of a top coat like Seche Vite to this because you don't want the glitter to escape.


The Verdict:  I think this might actually hold the record for my most-commented-on nails ever.  They were so sparkly, so holo-y, I must have had ten people comment on them throughout the day.  I did manage to break my index nail half way through the day though :(

The Other Hand: It should be made clear that I really don't do both hands like this.  It may be cheating but my camera set up only works for my right hand and I'm not that good at doing both hands the same.  Instead, I used the same base colour and just sprinkled the same glitter over the wet polish.  It doesn't look that different and if anyone asks, just show them your right hand!

Wednesday, January 14, 2015

Minnie Mouse Nails with OPI Over and Over A-Gwen (groan)

OMG LOOK GUYS I'M ACTUALLY DOING A BLOG POST AND IT HASN'T BEEN A MILLION years since the last one!  It's almost like I can organise myself to be able to go to work, sleep AND blog!  Yeah so I'm gradually working out a routine with working.  I did make the mistake of talking big about how I never have the same days two days in a row.  When I accidently wear the same nails THREE days in a row because I kept falling asleep on the couch, imagine the ribbing I got from my delightful co-worker Krista.  Thanks Krista.  Really appreciate it.  They're good nails!  I was sleepy!  Whatever.  I made them better yesterday by sticking jingly charms on them.  You're going to want to see the video at the end of this post.  I'm quite proud of how professional my videography is.  Anyway, MINNIE MOUSE NAILS YAYYYY 


First up, we need to talk about how amazing a red OPI Over and Over A-Gwen is, despite my having trouble typing the name cos of eye-rolling.  It's just the best, shiniest red ever.  Even though you will about a million cotton pads to get it off.  Cos it looks like you murdered someone.  Anyway, it's a great polish and it looks even greater when you stick white matte glitter on it!  Who doesn't want to be Minnie Mouse for a day? Or three.  OK I GET IT KRISTA GOD, even though she didn't say anything about it today.  Yeah, usual technique, cheap top coat then do your centre column, then fill in the sides.  Yesss.


The Verdict:  Love the polish, love the glitter, extra super love the charms I added later on, even though my bf HATES them with the fire of a thousand suns.  He actually got really angry at me cos I wouldn't stop jangling them at him.  I don't think that's fair.  Anyway, yay matte sparklies!

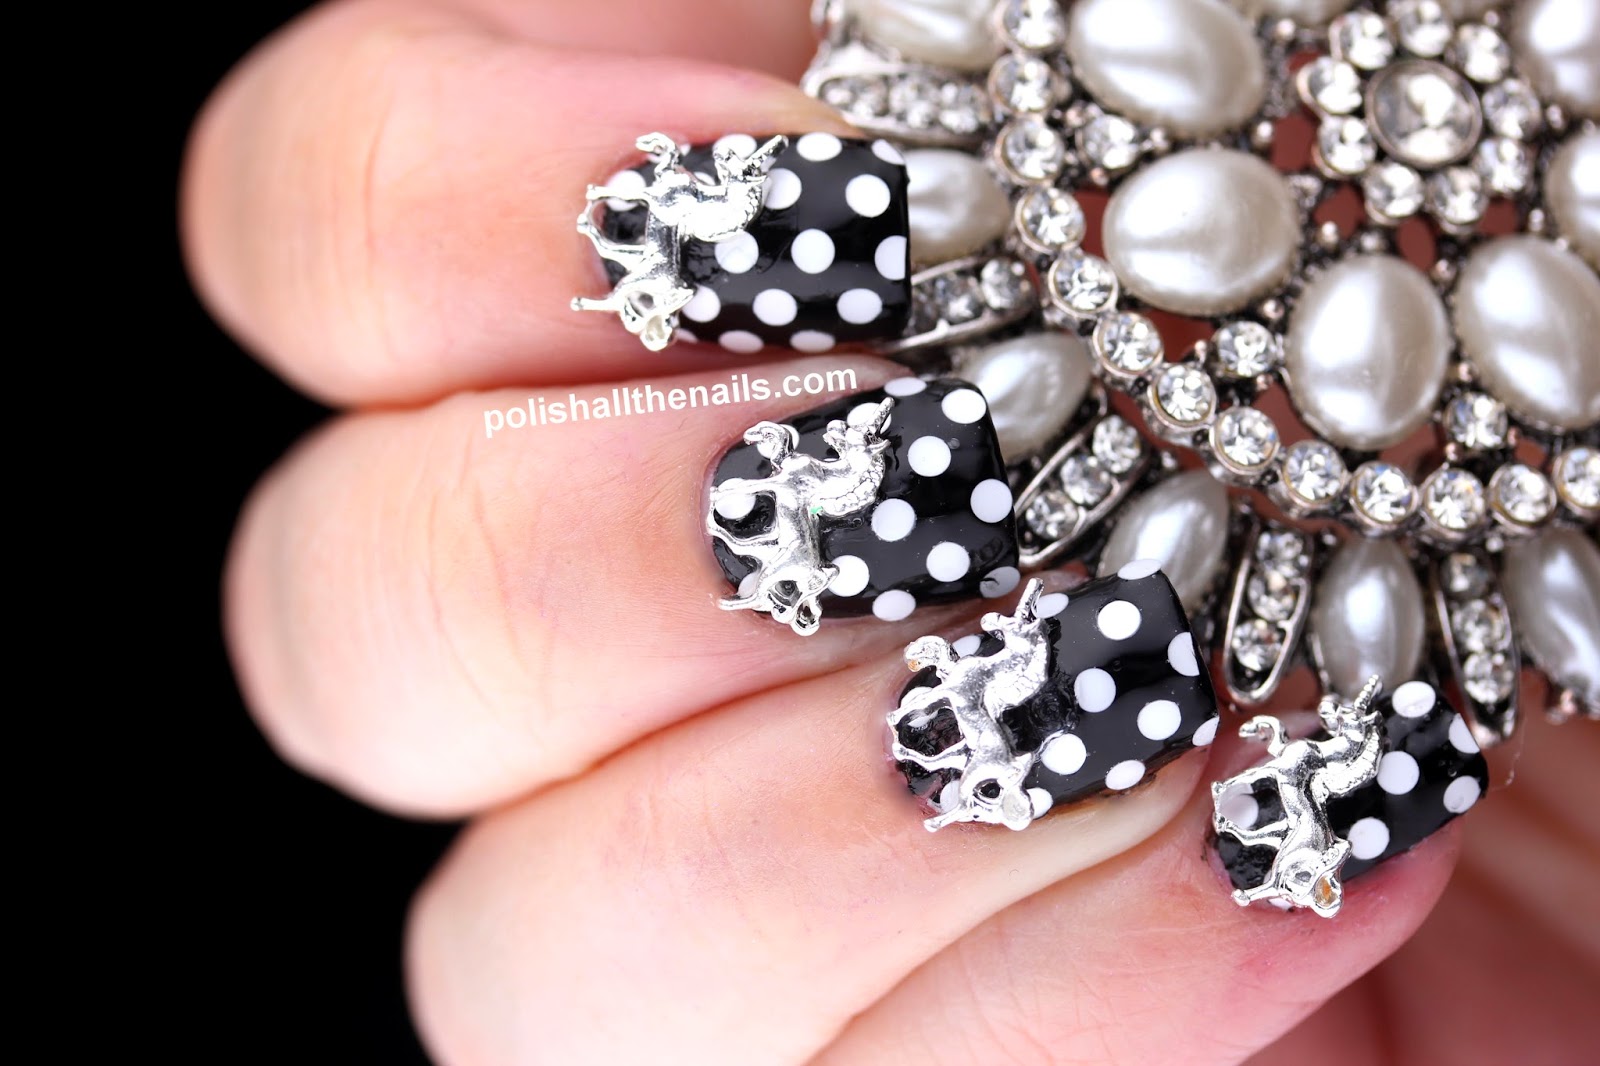
Turns out Unicorn Charms Go With EVERYTHING INCLUDING DOTS

So I conceptually get dotting tools.  They're a good idea and some people have done amazing things with them but I just can't get a satisfactory result of them.  The dots are  never completely even.   That's usually when I say screw it and use glitter.  I LOVE YOU AND YOUR CONSISTENCY GLITTER.  Especially circle glitter.  And unicorns always make things better.  


To start I did the usual two coats of China Glaze Liquid Leather and went to town with my Essence top coat to get the white dots on.  It's easiest if you do a row down the middle of your nail first as this will set the spacing for the rest of the nail.  Just keep the distance consistent for the next column.  You can use a small pair of scissors to trim any excess off the tips of your nails.  Once dry, use a bunch of nail glue to stick your unicorns from The Sparkly Shop on.  Yay unicorns!


The Verdict: I like the look of glitter so much more than that of dotting tools.  Even takes about the same amount of time, believe it or not.  And these unicorns go with EVERYTHING.

Ohhh yeah and also, you can finally get the same glitter I use for all these manis!  I have glitter sets for sale now at The Sparkly Shop.  And unicorns too!  Use the code BLOGGYPANTS to even get 16% your order!  Sorry to be pushy but you are helping a mother at home with her baby and me, who loves sparklies.  Sparklies!


XXX