Showing posts with label stripes. Show all posts

Saturday, January 17, 2015

Black, White and Gold Zig Zag Nails!

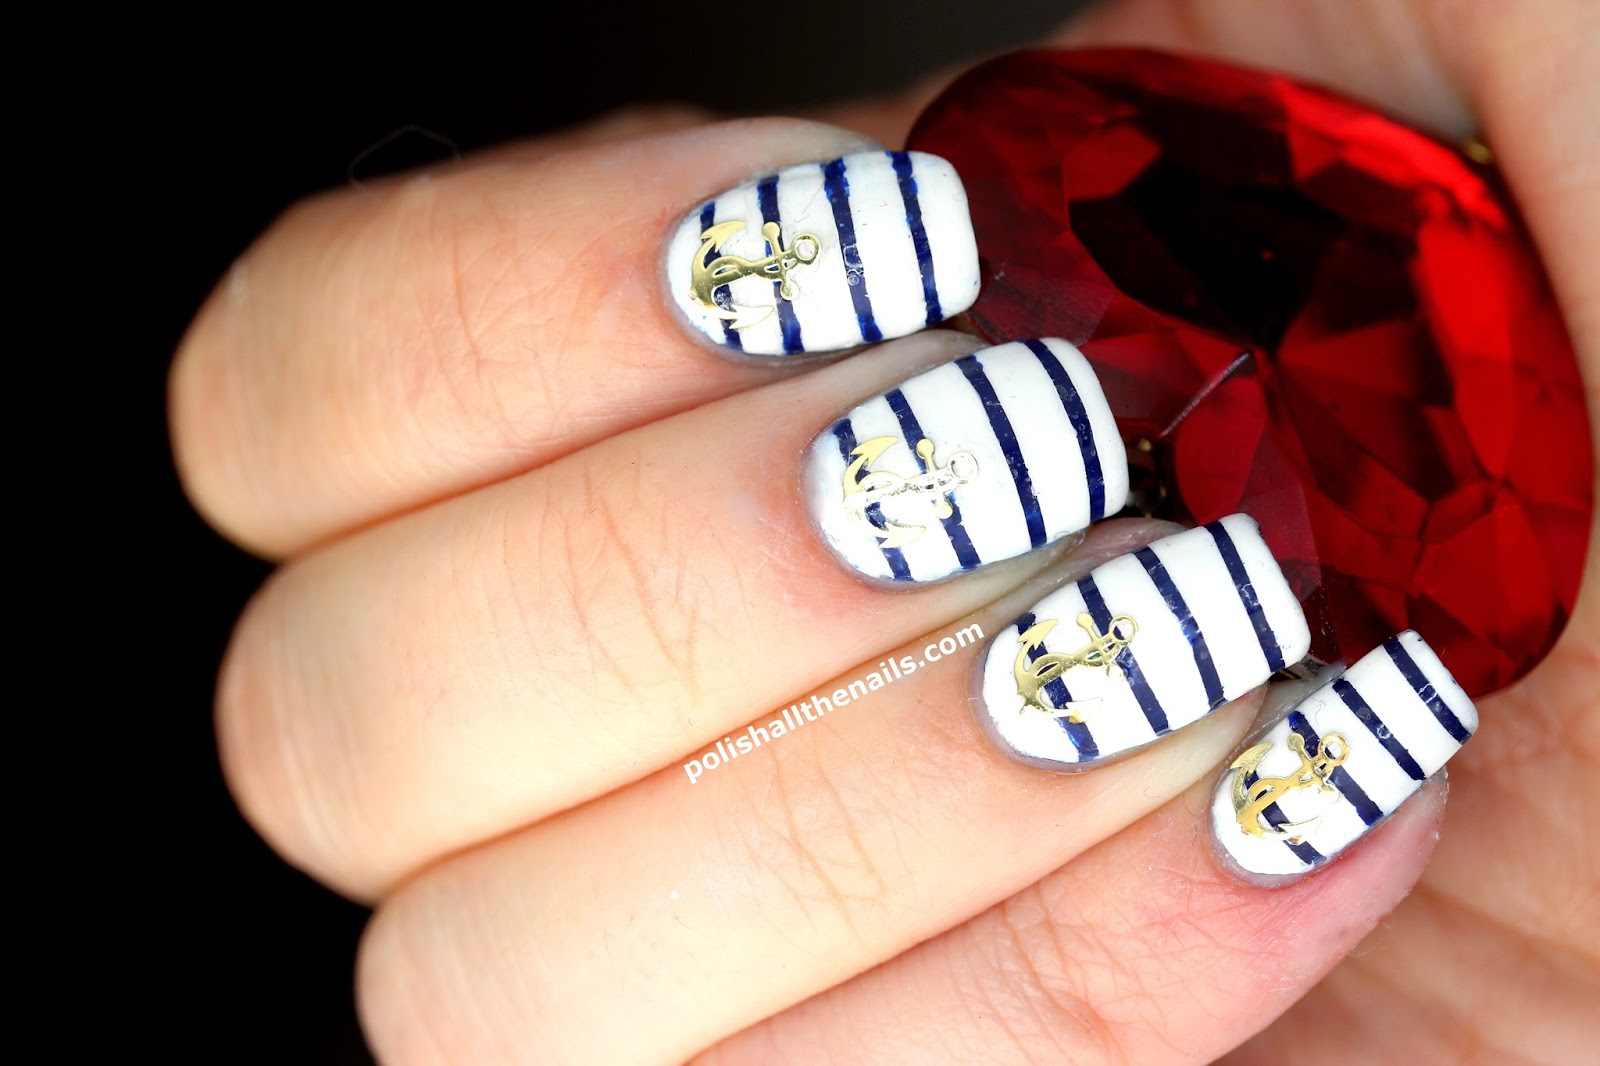
As much as I love the glitter mosaics, every once in a while I feel the need to do something different.  I stopped in at a craft store on the way home tonight as they tend to have all kinds of supplies I might be able to shoehorn into a manicure.  Along with a new, tiny paintbrush, I picked up painter's masking tape and metal craft scissors with a zig-zag blade.  Oh yes, I'm going to have fun with these!

I spent a good couple of hours watching The Mitchell and Webb look and staring at the scissors, trying to decide how best to use them.  I finally decided to try zig-zag strips as it's something I've tried to do by hand before but stopped because it was taking too long.  To start, I applied three thin coats of L.A. Girl Delicate, a shimmery white creme.  Once it and the coat of Seche Vite were totally dry, I cut thin strips of the painter's tape and laid them on my nails.  I then added the black and gold over the top, Rimmel Black Satin and Revlon Gold Coin respectively.  


The Verdict: I'm really happen with how these came out, especially with the gold accents.  I'm also super happy with how my index and ring fingers are holding up.  They both have breaks but are holding together with the tea-bag method.  It actually works really well - you cut a tiny piece of tea bag and stick it over the break with nail glue.  Hang in there, nails!

Ruffle Nails!

So, things have been a bit quiet around these here parts, it's ok, I've just been going through the process of getting a new contracting job, incorporating myself and all the endless paperwork that that entails.  Given I had a three week lead time before starting, I decided to peace out and go to Cuba for a week!  It's so beautiful there I can't even words.  I mean, this is where I was all week.  This was the walkway leading down to the beach:  


That's not a stock photo, I just held my phone up and that's what happened.  So I've been warm for a whole week.  

But you aren't here for the Cuba photos, you're here for the nails!  I wanted something bright and colourful before I left and since I haven't done ruffle nails in a while, I think it's time!


To start, I applied two coats of OPI My Boyfriend Scales Walls.  It's a really good white base colour.  Next I started at the bottom near the cuticle and just brushed on Urban Outfitters Blue Jeans.  I then pulled out my most opaque cremes and my larger dotting tool and applied a row of dots at a time.  Just make sure you place the dots as far apart as you can, helps make it look extra ruffley.  In order from the bottom up starting with Blue Jeans, the colours are Urban Outfitter (UA) Rodeo Sweetheart, UA Flip Flop, Sally Hansen Celeb City, UA Westside, UA Mojave, UA Bandeau, UA Smush and Revlon Gold Coin.  In case you can't tell I've been on something of a UA kick lately.  They just have really nice colours for $4 each.


The Verdict:  Love Cuba, love ruffles.  I know that most of you are American and can't go but wow, it's so gorgeous and peaceful.  White sand, 25 degrees and sunny, turquoise water, so awesome.  I'mma post more too... :D

Wednesday, January 14, 2015

Annoying Nautical Nails with OPI Umpire Comes Out at Night and Revlon White

OH MY GOD what a pain in the arse these nails were to do.  They don't look it but all the way along, pain, pain and suffering.  First I tried to do white with blue stripes but it looked weird.  Then I did this but the blue and white both bleed, but in different ways.  Then I didn't clean up right and had to spend ages photoshopping the white bits off my fingers.  Just urgh.  Don't even get me started on the anchors.  I've spent like hours on this for no reason, all because I like anchors and stripes.  URGGHGHFGHGHGHGHG.  Just squint when you look at these, ok?  Looks more like how I want it then.


Alrighty so it's the law to have stripes with anchors and I really desperately wanted to use my anchors because they're part of my recent China mail and look at them, they look so cool.  HOWEVER.  These bastards will literally cut you.  If they are not completely buried in top coat or glue, they will start to flake off and those edges will slice your fingers a bit.  Ridiculous, right?  Worth but way to be dramatic, nail art "stickers".  Anyway, this is about a million coats of first OPI Umpires Come Out at Night followed by a white polish from Revlon Neon Nail Art Duo.  I used a thin brush a bunch to clean up the stripes around the edges.  Using liberal amounts of top coat, I then stuck the anchors on.  You seriously can't use enough coats of this.  Bury them.  Oh and I'm still recommending them despite the cuts because LOOK ANCHORS.  Urgh, this is not a coherent post, too bad :) 


The Verdict: If I squint this is what I wanted.  Crisp white with crisp stripes and those awesome shiny gold anchors.  If I can ignore the execution, that is.  These are it, if you're wondering.  Alipress is my new obsession, you can spent so much time on that site, it's crazy.  And ultimately expensive.  Eh.

I FINALLY GOT NAIL FOILS TO WORK AHHHH

Nail foils are so amazing in theory.  Super shiny, super holo and really quick to do.  However, as soon as you move or apply top coat, they die.  Thus, the eternal quest to find a top coat that doesn't ruin the finish of the foils.  I FOUND IT.  Sally Hansen Miracle Gel top coat DOESN'T KILL FOILS.  To prove it, I thought I'd have a go at doing nail foil stripes and it turned out awesome except for where I kept trying to cover up the gaps.  SHINNIEEEESSSSSS!  Oh and of course I need charms

To start I applied three coats of the amazing neon coral China Glaze Thistle Do Nicely.  I have no idea where this came from but it's so bright and neon.  In person it's ten times brighter cos neon are impossible to photograph.  Anyway.  Once the three coats + Seche Vite had dried, I applied striping tape to do my foil stripes.  I applied the glue over the tape and then peeled the tape off before the glue dried.  Once it was clear, I applied my gold holo foil over the top.  My mistake here was to try to fill in the gaps cos it just lost some of the definition but still, it's shiny.  Two coats of the Sally Hansen top coat and some bow charms and I'm good to go.  


The Verdict: Well I think my foil obsession is a thing now so brace yourselves.  It's just so shiny!  I love shiny.....

Bow charms from The Sparkly Shop for $1.99 a pair!
XXX