Showing posts with label glitter gradient. Show all posts

Saturday, January 17, 2015

Review: Ciate Jewellery Box over Revlon Gold Coin

My previous job had a incentive program that let you "High-5" people when they did a good job, or agreed to swap with you.   This lead you to collect points that could be redeemed for a bunch of different stuff.  I obsessively hoarded my points and when I left, I managed to cash out these points for a ton of gift cards.  Unfortunately these gift cards could be used at Sephora so I did what any normal person would do - spend $120 on nail polish :D.  Sure I could use this for more productive things but too bad, I want fancy nail polish! 

A particular stand out of the polish I grabbed at random like I was on one of those competitions that gives you all you can grab in two minutes was Ciate Jewellery Box.  I don't own anything like, and that's impressive, given the amount I have. Jewellery Box is a clear polish with absolutely minuscule black glitter and larger gold holo glitter.  It's actually super opaque which surprised me - I initially fully layered it over Revlon Gold Coin but moved to a gradient as no gold was showing through!  Black and gold is always a good combination and glitter this tiny makes for a very interesting texture.  


The Verdict:  I love this polish and am now going to have to keep my eye out for more.  If only it wasn't $17....

Friday, January 16, 2015

Purple and Gold Hand-placed Glitter Gradient!

The Essence Nail Art Decoration Kits still have plenty of glitter in them, so I'm clearly going to do more glitter manis.  I try to not do these every day because I don't want you to get sick of them but this is so totally permission because I have to review these kits properly!  I really wanted to do a full coverage mani with the medium sized gold holo glitter from the gold kits but I've done this one recently, can't be predictable.  Glitter gradient it is!


I don't know what it is, but I'm totally obsessed with Urban Outfitters nail polish right now because their creme colours are really good at going with my glitter.  And the bottles are so square, they tesselate nicely in my drawers.  And they're $4 each.  So I started this mani off with three coats of UA Bandeau, a strong purple creme.  Next, I tipped a little of the gold hex glitter onto a plastic container lid (or anywhere where you can retrieve said glitter without dying) and went to work with my orange stick and cheap top coat.  I found it easiest to start at the cuticle - keep them nice and close together - then just work up until you think it's good.  Nice and easy, this one.  Then all the top coat.  Cos we want our glitter to stay cos yay sparklies. The end.  For this bit, there's more down there vv :)


The Verdict:  Ignore the bubbles in the top coat, that's just cos I tipped two Seche Vite bottles together and it was chucking a tanty.  You can't really go wrong with purple and gold, especially when it's sparkly and the purple is such an awesome colour.  Sparkly!

Rainbow 90's Computer Logo Nails!

You know you have a problem when a perfectly matched rainbow pot of glitter just isn't that exciting because it isn't holo.  I realised the other night that this is stupid and I should try it out.  Not everything can be holo, Laura! The hardest part was choosing a background colour because I've done a rainbow over black literally a million times.  Let's take a look at rainbow glitter Hooplah from Impulse Cosmetics over Revlon Royal.    
I'm still so mad at my middle finger for being an asshole and breaking that even my favourite blue jelly, Revlon Royal, can't even fully distract me from how uneven it is.  Blerg.  Anyway, I chose Royal mostly because it was already there, on my desk, and it's the best blue ever.  It does need a few coats but it's worth it for how shiny it comes out.  Once dry, I used my usual technique to create my chevrons.  Starting at the top of my nail in the middle, I placed one piece of glitter in each colour, spaced evenly.  It's then just a matter of building out each side.  Keep an eye on your spacing as you go and you should get a nice even chevron.  Voila, mid-90's computer logo rainbow nails!


The Verdict:  Have to say thanks to my trainer Ben, because these totally look like a 90's computer logo.  Which is good.  I'll always love Royal, it's my perfect blue that I think only benefits from being a finicky jelly.

The Other Hand:  I'm continuing my streak of being honest about what's on my left hand and this time I used the same base colour and just sprinkled the glitter over my thumb and ring fingers.  I find sprinkling better than dunking because then you don't get patches with too much glitter that won't lay flat.

Real Mermaid Glitter Nails

Once in awhile, I get the urge to do what most would consider insane levels of glitter.  I do it because I love it and I love sparklies.  This took a really long time to do - two night in fact - but it's totally worth it because it's just so very, very sparkly.  The glitter from LoveNailz etsy store goes so well together too.  I hope I get reincarnated as a mermaid, and my tail looks like this.  That would be nice...
To start, I applied two coat of Chanel Blue Satin, a dark blue shimmery creme.  Not that the base colour really matters because I completely covered it in glitter but there you go anyway.  Next, using my usual technique, I painted a thin stripe of top coat down the center of my first nail.  When you're planning on doing so much glitter, it's important to do thin stripes otherwise the outer edges will be too thick with top coat.  Then, taking an orange stick and four little piles of my glitter, I went to work, starting with a column of glitter that sets my spacing for the whole nail.  I then worked out to each side.  Don't worry if pieces stick off the edge of your nail, they can be trimmed to get the perfect edge-to-edge effect.  I even cut pieces in half so I wouldn't have gaps around my cuticles.  I don't like that. Top it with two coats of Seche Vite - making sure to wrap your tips - and you're done! 


The Verdict:  Not only is this the most glitter I've ever stuck to my nails, I think it might just be my favourite.  More rainbow is always better but the colour graduation here is so smooth that it just wins.  Not to mention how there aren't any areas I'm unhappy with the application, and it's the most sparkly.  So yay!

Thursday, January 15, 2015

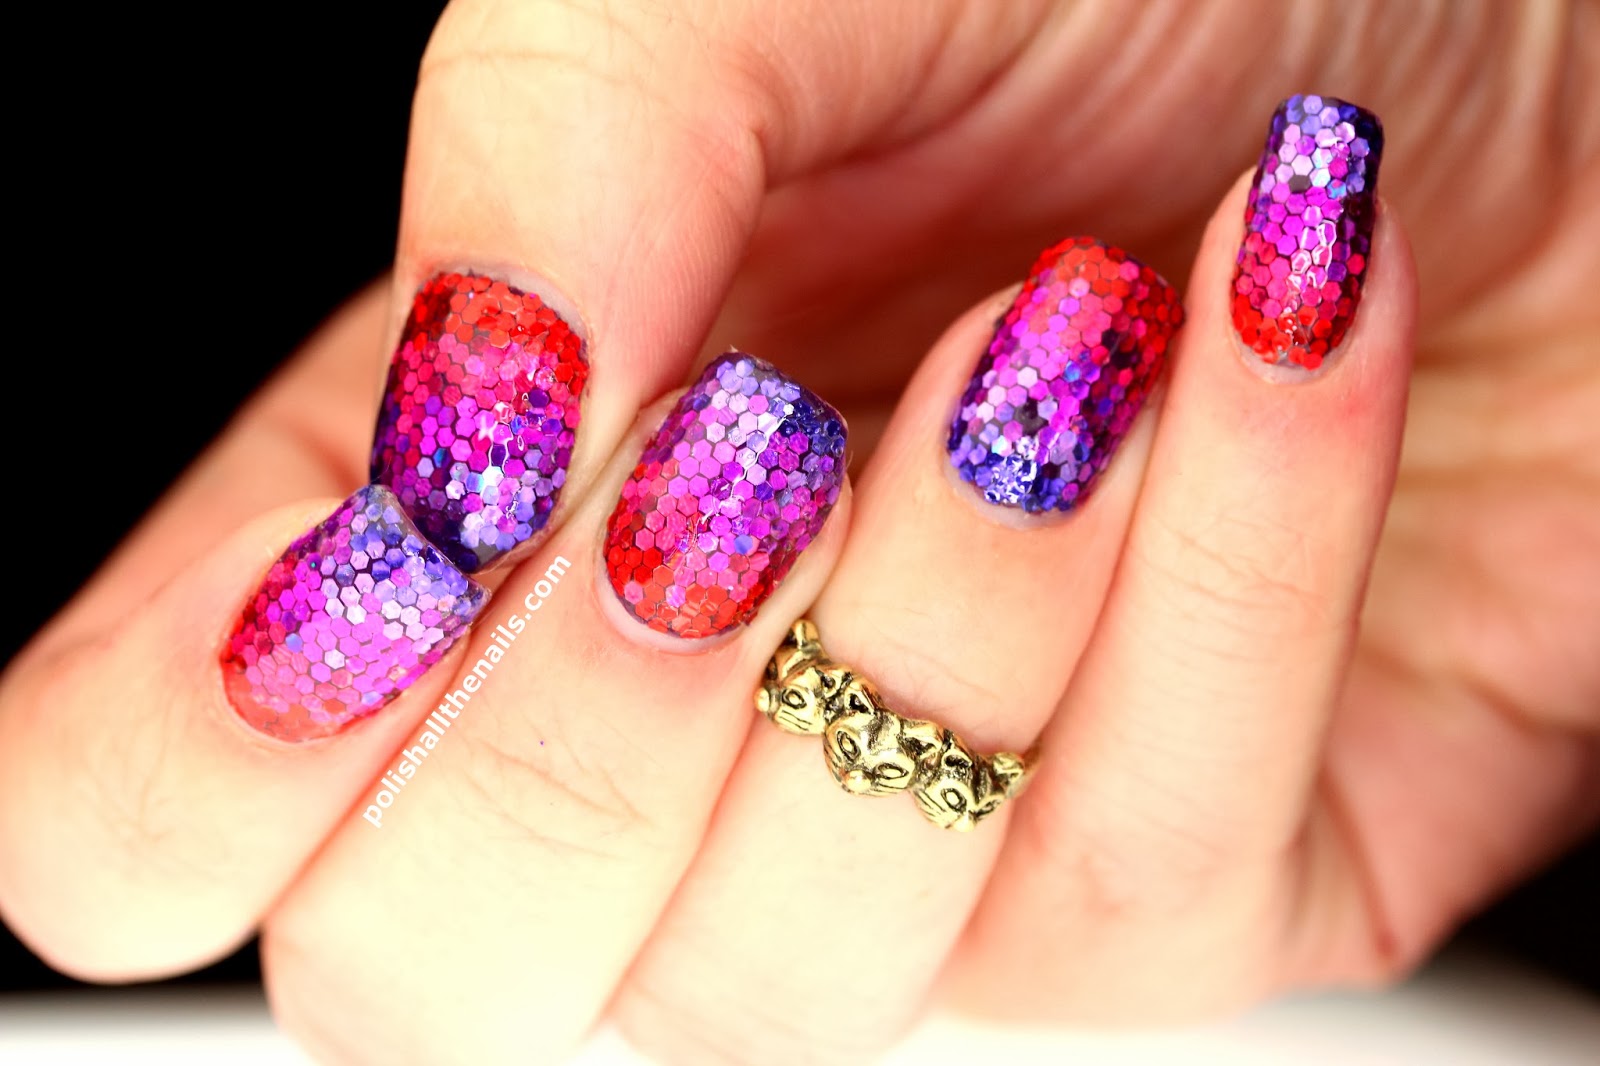
My 500th Post: Red-to-Purple Mermaid Nails!

Oh hi!  I'm back!  I was in Barbados for a week so that explains that temporary slackening in post rate.  More importantly, this post happens to be the 500th post I've completed on this blog.  That's over two years of glitter, taping, marbling, experimenting, successes, failures, inundations of support, picking glitter out of the the cat, my bf's beard, the carpet at work, and even off clothes after being away for a week.  It's hard to figure out what to say, really.  Thank you, mostly, for keeping reading.  I've never kept a hobby going for even a fraction this long before so yay!  I wish I had something that was executed better to show you but I have what I have.  It's almost more fitting that I don't have a big show and dance for this milestone.  I've never been good at keeping a schedule. 

Before I went to Barbados, I got about halfway through a red to purple glitter placement.  It was fine but I kept getting distracted and it never got finished.  Now I have some time,  I had to finish it.  It's appropriately Valentine's Day-y too.  I went with my usual method of two coats of a base colour - in this case Bourjois Paris Purple Fiction - then went to town with my glitter, orange stick and cheap top coat.  I stuck to the usual line of glitter down the middle, then filled out each side.   The problem here is that I'm nearly totally out of Seche Vite and so my top coat is thick and lumpy.  Which makes me sad.  But it's honest.  I'll show you it anyway. 


The Verdict:  The 500th post snuck up on me.  I knew it was coming but I didn't quite realise it was going to be today.  It's a blessing though because now I don't have to worry about what to do for it!  It's done!  And sparkly.  That's important.

So.  Thanks again.  Love you :D:D:D

Review: Beyond the Nail Mermaid Tail and Peppy Leopard!

Alrighty, swatchy-swatch time!  The lovely ladies over at Beyond the Nail were kind enough to send me some polishes to review and were even patient enough for me to get around to actually doing said swatches.  They must know me well as both Mermaid Tail and Peppy Leopard were both very sparkly, which is about all I need from a polish.  Let's take a look, shall we? 


First  up, let's take a look at Peppy Leopard, a mix of micro silver and purple glitter, accented with pink matte hexes.  I started by applying two coats of American Apparel Neon Violet, then added Peppy Leopard as a glitter gradient.  This is one of those glitters that looks best as a gradient.  It does build up to full coverage well enough but you need quite a dark polish to contrast with the lighter micro glitter.  I do like the matte glitter though.  Very leopard-like.


Second, we have the very awesome Mermaid Tail, a mix of green, teal, blue and purple glitter with a hint of pink shimmer.  Love this not only because it's all holo and sparkly, but also because it's nice and full coverage.  Here, I started with two coats of each coloured polish, added a coat of Seche Vite, waited for all that to dry then added my Nail Vinyl Lightning Bolts.  I added two thin coats of Mermaid Tail over the top and bam, sparkly lightning bolts.  I really like polishes that just use the one size of glitter, especially when that builds up consistency so nicely. 


The Verdict:  Both Mermaid Tail and Peppy Leopard are really nice polishes.  Mermaid Tail probably wins for me, because of the sparklies, but both are good.  You can find these polishes here.

These items were sent to me for my honest review.  All opinions are my own. 


Wednesday, January 14, 2015

Rainbow Mermaid Nails! Not to be Confused with Others I've Done!

It's been a little while since I've done a glitter placement.  Partly because I keep falling asleep on things and partly because of a super secret project I've been working on.  Very super secret.  I've already told you too much.  But when it's ready oooooooo well.... Anyway, I had a little time so of course that means glitter rainbow mermaid nails. 

I keep getting asked over and over about a tutorial for these types of nails but I don't really know what to tell you.  You just stick the glitter on, being careful with the alignment.  For this one I just used any old black base to apply three coats then applied a stripe of Essence Top Coat - because it dries slow - then did a column of glitter down the centre of my nail.  Set the spacing in that column and it's easy to just keep it going for the rest of the nail.  Trim any excess bits with sharp sewing scissors and slather on the Seche Vite and you're done.  Rainbows for everyone!


The Verdict: I love rainbows, so of course I love this.  Look how sparkly it is in that video.  I had some issues with this particular glitter because it was super cheap but overall it's sparkly.  Buy proper glitter kids, and save the hassle! Sparklies!

Sunny Ocean Mermaid Nails!

GLITTTTTTTTTTTTTTTTTTTTTTTTTTTTTTTTAAAAAAAAAAAAAARRRRRRRRRRRRRRRR.  I'm Australian so it's still aaaaaaar.  It's been a while since I've done a good mermaid glitter placement so I did that.  Some of the macro photos show why it's not the best idea to try to do glitter placements when you're tired cos they go a bit wonky but over, sparkly.  So the question I get asked the most is where I get my glitter from.   WELLLLL on Friday you can get some from me.  At The Sparkly Shop.  In very limited quantities because I may be a glitter hoarder but I'm not that much of a glitter hoarder.  Also charms.  Anyway, on to the pics!

Usually dealio here.  I started with two coats of Revlon Carioca Crush.  It was physically impossible for me to not buy this polish, it's that good of a blue.  Sure, navy might have worked better in this mani but I can live with it.  Then, doing my usual technique - of which you can see a video here - I applied my four colours of glitter - blue, tea, lime and gold.  This is the single hardest part about glitter placements - finding colours that will go nice together in a gradient.  Two coats of Seche Vite and you're done.


I have a few gaps in my glitter and I set my aperture too low so my depth of field is too shallow but otherwise it's sparkly and that's pleasing to me.  I love being a mermaid doing my mermaid things like doing mermaid programming at my mermaid job.  That has a lot of penises.

Yeah so about the shop thing, if all goes to plan, I'll have three different glitter sets up for sale on The Sparkly Shop on Friday.  I swear I don't mind either way but if you want find out exactly when and what will be going up you can have a look at our newsletter.  I solemnly swear on my polish collection I will never do anything with your information other than send you sparklies.  
XXX