Showing posts with label geometric. Show all posts

Saturday, January 17, 2015

Year in Review Part 1: Glitter Mosaics

Since my super sparkly glitter nails are still holding up and they took so long I can't bear to take them off, I'm going to do what I've been putting off for a while, and that's to do my 2012 year in review post!  Yes, I realise it's the 30th of January but I've done 390 posts on this blog and I want to reflect a little.

There's too much here to fit in one post so let's start with the first part of my three part reflection.  Gotta start with glitter, right?

Top Glitter Mosaics of 2012

 5.  Most Complex Glitter Mosaic

My most recent and most complex glitter mosaic comes in at number five.  It's sparkly and took forever but the holo glitter I usually use is even more sparkly and is a better colour combination.  I can still see where there glitter surface is uneven, which annoys me, but as a whole, it's still awesome.  


Another recent post, I was really happy with how my red and blue harlequin nails came out.  This also, unsurprisingly, took a long time to do and nearly sent me cross-eyed.  It's at number four because I love a good rainbow but makes it on the list because while the colours are clearly separate up close, from a distance it looks purple, with pretty red flashes.  I love that I got the glitter to line up so neatly, it makes me happy.  


I usually stick to using small glitter because I HATE it when pieces of glitter don't sit completely flat on my nails. That's when I cave half a day in and end up picking it off.  Anyway, I have a large collection of little pots of glitter and decided to give the larger pieces a go, because they work so well together, colour wise.  I even had the time to trim the glitter so it sits properly at the cuticle and nail tip.  Yay rainbow fishies!


2. 3D Geometric Glitter Nails

Diamond shaped glitter is always tricky to work with because it so easily sticks up and catches on things.  I was playing around with it one night when I realised that I could make cubes out of it!  I wasn't sure about making a full coverage mani with it so I let the cubes meander around my thumb and ring finger.  Turns out, that works pretty well!

Full post


I've done a ton of different manis with this holo glitter but the one that started it off were my stained glass glitter nails I did for my friend's birthday.  All night people commented on my nails, asked if they were stickers, basically showered me with attention which is pretty much all I ask for in life.  I can see things I want to fix here, but it's sparkly so it's ok. 


Yay glitter!

Thursday, January 15, 2015

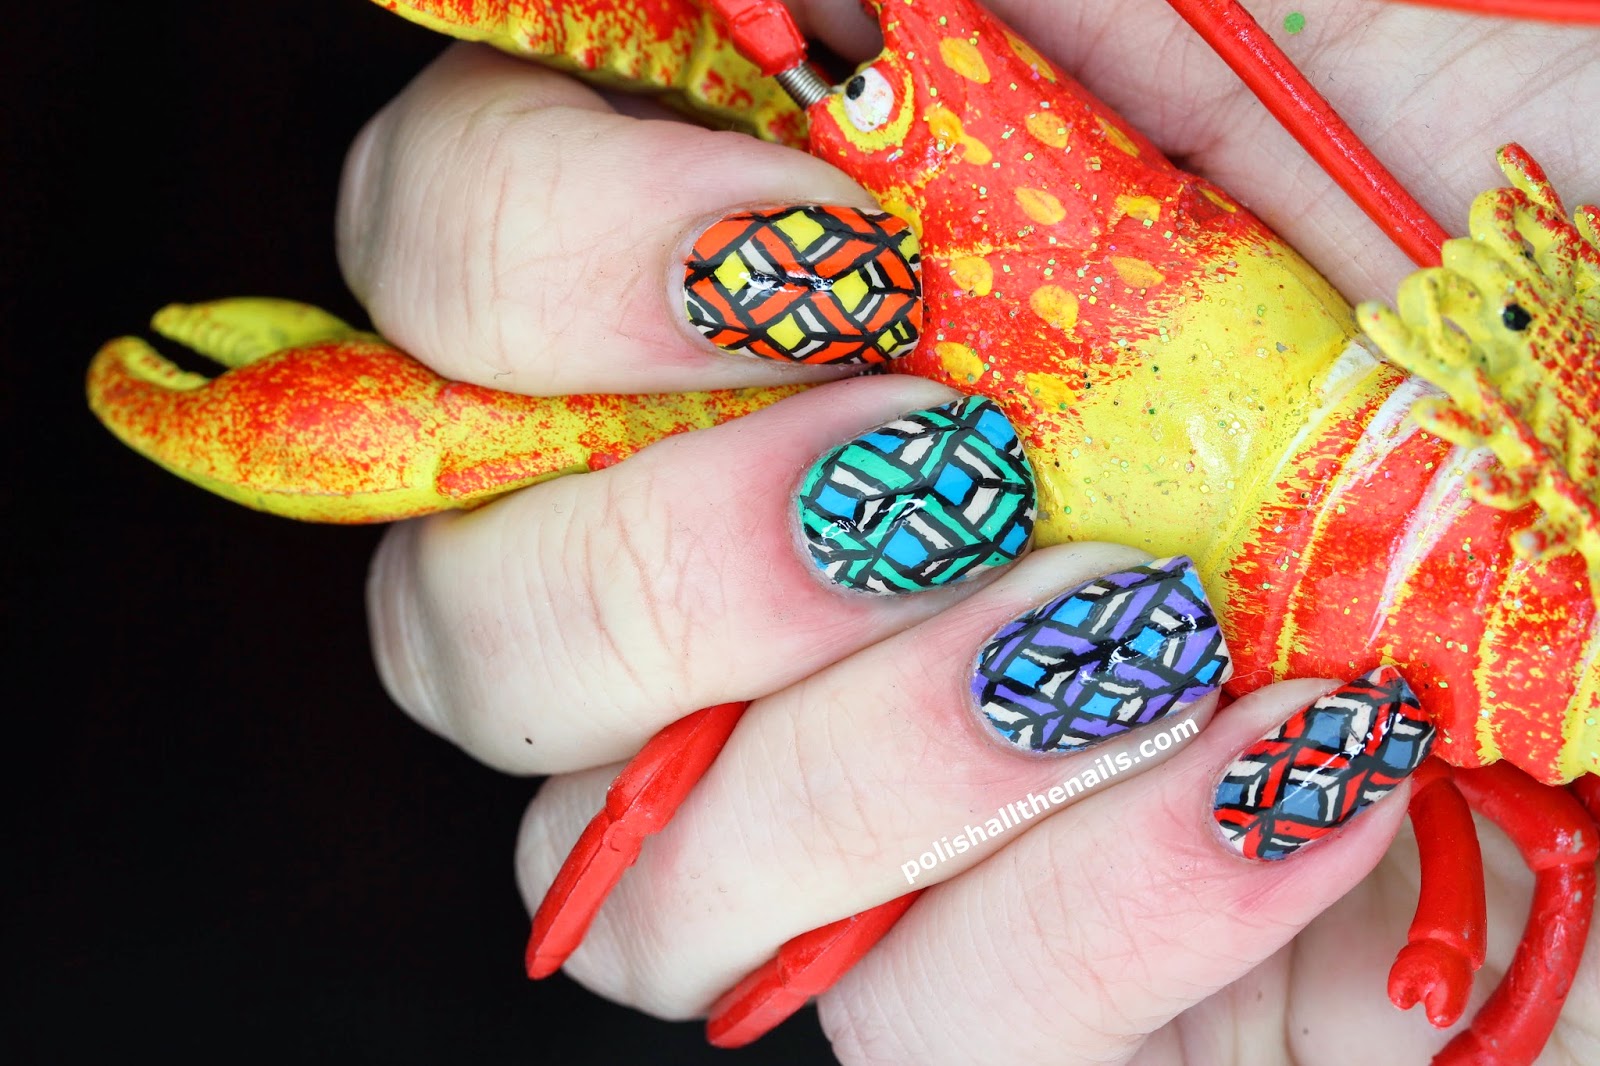
Geometric Nails Using Acrylic Paints and Nailumium's Tutorial!

I'm pretty good with glitter.  Give me a pattern and a little time, odds are I can produce it with glitter.  Acrylic paints, on the other hand, yeah, not as good.  I think it's because with glitter it's really easy to correct mistakes - just move the glitter around - but paint is so unforgiving.  I'm jealous of the incredibly talented people who do amazing things with paints so I trimmed down a few more brushes and gave a new pattern a try.  I saw a great tutorial from Nailumium for Geometric Skittle nails and gave it a shot.  Well, two shots, and this is the better one.  Let's take a look, shall we?

I started off with three coats of My Vampire is Buff, the go-to off-white used the internet over.  I wanted something nearly white so that was the obvious choice.  Following Nailumium's tutorial, I started with free-handing the criss-crosses with acrylic paint.  I've found that trimming a small brush down to nearly nothing really is the best way.  And watering down the paint a bit.  Using a contrasting colour, I filled in my matching squares.  Once this was all dry, I applied a coat of Seche Vite.  This not only made sure everything was set, ready for the black outlines, but had the bonus effect of letting me fix any mistakes I made with my outlines.  You can just use a toothpick and the paint comes right off.  It's really nifty.  A second coat of Seche Vite over the black and you're done. 


The Verdict: I thought these came out super well from just looking at them in person.  Turns out that while these are acceptable, cameras are not acrylic paint's friend.  Every single flaw, molecule of paint out of place really shows, which is why I re-did this whole mani from scratch after looking at my first round of pictures.  My recommendation is to totally try this design - it's easy enough and looks fabulous - but just go slow and be as careful as you can.  If you're going to take pictures, that is :)


XXX