Showing posts with label freehand. Show all posts

Saturday, January 17, 2015

Sunset Gradient Maze Nails!

So I may have mentioned that I'm not working right now.  My company kinda collapsed a bit, but that's ok cos we were compensated.  My life right now is me, sitting at my computer at strange hours of the day and night, talking to my cat and occasionally my boyfriend.  It also means for some weird reason that my impulse control has gone out the window.  I dyed my hair from a box which is a terrible idea if you're blonde and when one too many nails broke on my photo hand I got fake nails.  Wooo! It's kinda hard to type but I'm digging them a bit.  They're all long and not too thick.  They're long enough now that I feel comfortable totally copying an amazing design Chalkboard Nails did the other day.  I'm not kidding when I say copied.  Go look at her stuff.  Not afraid to say I both love her and hate her a bit, she's too good!

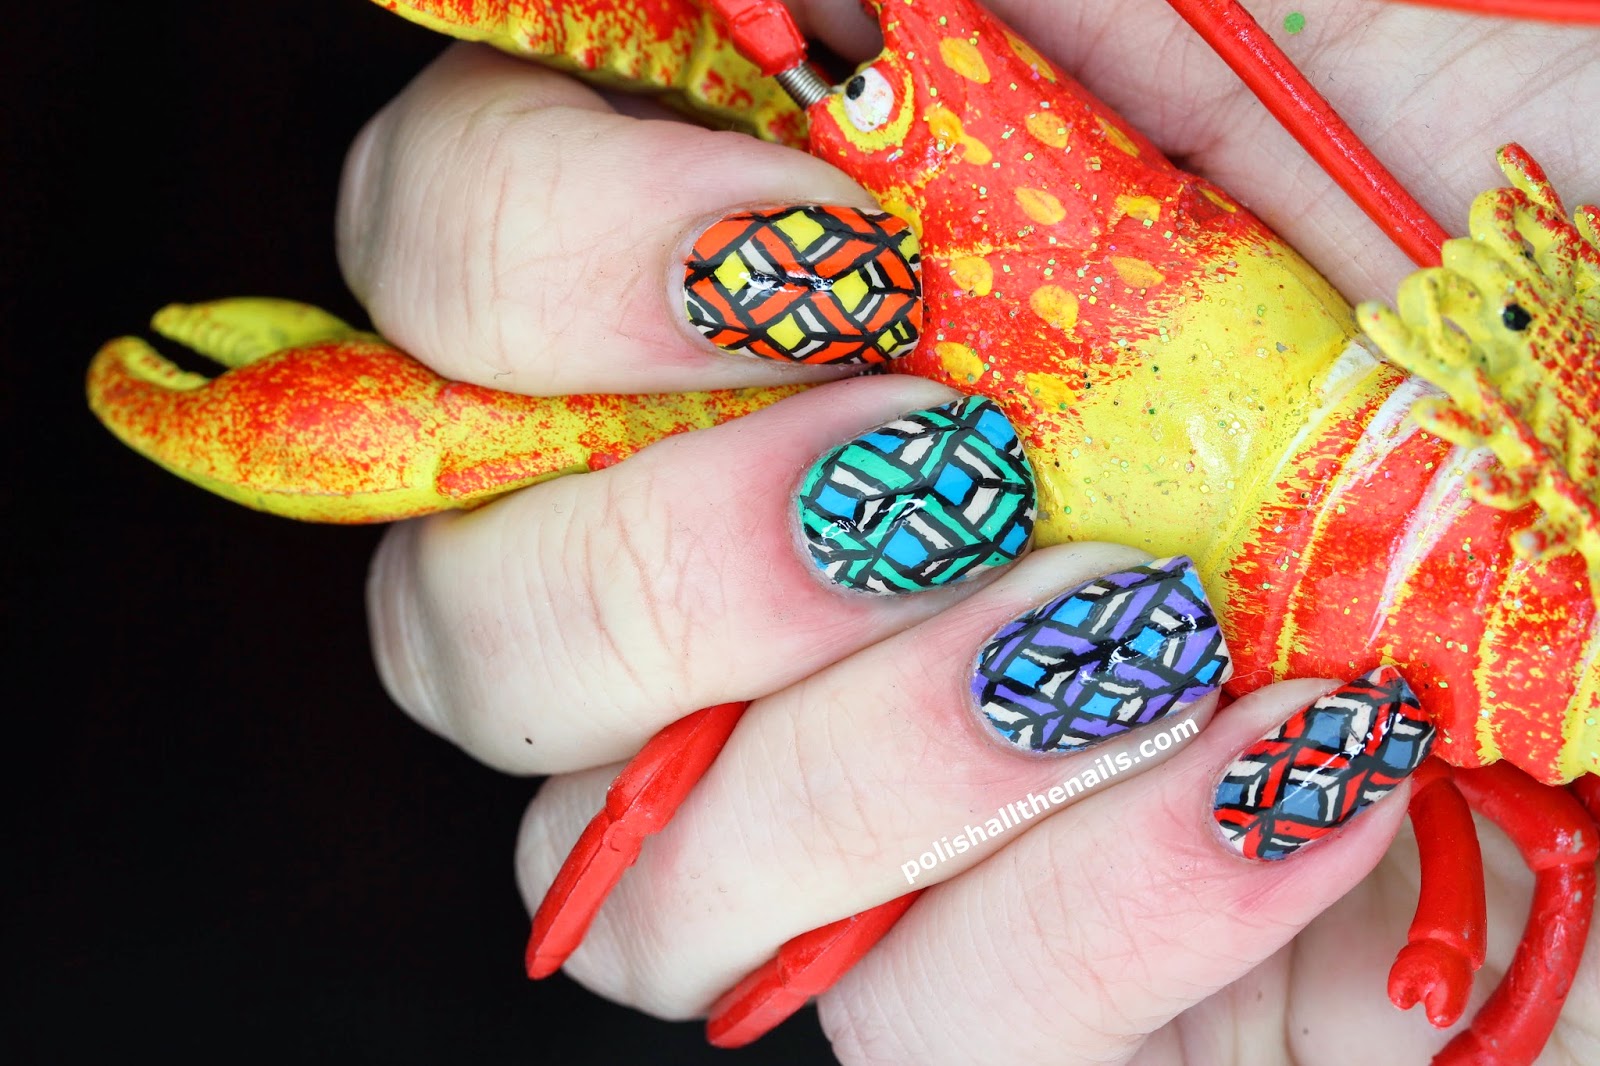
Anyway, for these nails I finally got the makeup sponge gradient to work properly.  Turns out a white base is a really good idea.  I started with two coats of L.A. Girl Delicate then painted stripes of American Apparel Neon Yellow and Neon Blue, with Urban Outfitters Hottub in the middle on a sponge.  I then just dabbed it on my nails.  The colour choice was incredibly inspired as you get a wonderful yellow-orange-pink-purple-blue sunset gradient.  I added a coat of Seche Vite cos it never hurts then freehanded the maze design using LA Colors Art Deco nail art polish.  I thought about using tape but that's just too much work.  A final coat of Seche Vite and I'm done!


The Verdict: Man, this design is amazing, I wish I'd thought of it!  I also don't mind my new fake nails even though they woke me up last night cos they're taking a bit of getting used to.  Yay gradients!

Friday, January 16, 2015

Long Cat Nails!

When someone visits my apartment, if they sit still for more than about five minutes I'm going to paint their nails.  It's inevitable.  I'll get a guy one of these days... Anyway, I had my nice friend Erica around the other day and because she does amazing work painting intricate shoes, I instead bribe her to actually paint my nails.  She did a great rocket cat themed mani for me earlier in the year so of course the next logical progression is Long Cat.  That looks like my cat.  Yeesssss

To start, I applied three coats of China Glaze Electric Beat and let it dry completely.  Erica then worked her magic with acrylic paints to create the wonderful image you see before you.  She started by marking out the shape of the body so it would line up properly, then filled in the body, detailed the face and added shading, clouds and one tiny tree, you know, for scale.  I then topped it off with a coat of Seche Vite and done, the longest cat is done! 


The Verdict:  I love how this came out, especially since it looks like my cat, Rocket.  Who is the cutest cat in the world.  Thanks Erica :D:D

Thursday, January 15, 2015

Yo Dog, I Heard You Liked Nail Polish.......sorry

I apologise in advance for any and all meme related content in this post but come on, how could I not do it?  So here we go: I heard you liked nail polish so I put some polish on your nails!  With polish!  But not actually polish, acrylic paints!  I don't know how I'm going to hold all this polish on my nails!  Yayyyyyyy! ....sorry. I'll stop now. 

So I have an awesome friend who does this great small scale acrylic painting on shoes so I steal her sometimes and bribe her to do said painting on my nails.  She's done my cat in space, and my cat as long cat for me so far, and this time I wanted her to do me a pattern of nail polish bottles.  After applying two coats of OPI My Vampire Is Buff, she did her thing with acrylic paints.  It of course came out super awesome.  Thanks Erica! 


The Verdict:  I love how this came out.  The colours in the bottles work so well with the off-white background and it just looks all-round awesome.  I only wish I could have kept it on longer.  But you know, the glitter beckons.  Thanks again Erica!

Geometric Nails Using Acrylic Paints and Nailumium's Tutorial!

I'm pretty good with glitter.  Give me a pattern and a little time, odds are I can produce it with glitter.  Acrylic paints, on the other hand, yeah, not as good.  I think it's because with glitter it's really easy to correct mistakes - just move the glitter around - but paint is so unforgiving.  I'm jealous of the incredibly talented people who do amazing things with paints so I trimmed down a few more brushes and gave a new pattern a try.  I saw a great tutorial from Nailumium for Geometric Skittle nails and gave it a shot.  Well, two shots, and this is the better one.  Let's take a look, shall we?

I started off with three coats of My Vampire is Buff, the go-to off-white used the internet over.  I wanted something nearly white so that was the obvious choice.  Following Nailumium's tutorial, I started with free-handing the criss-crosses with acrylic paint.  I've found that trimming a small brush down to nearly nothing really is the best way.  And watering down the paint a bit.  Using a contrasting colour, I filled in my matching squares.  Once this was all dry, I applied a coat of Seche Vite.  This not only made sure everything was set, ready for the black outlines, but had the bonus effect of letting me fix any mistakes I made with my outlines.  You can just use a toothpick and the paint comes right off.  It's really nifty.  A second coat of Seche Vite over the black and you're done. 


The Verdict: I thought these came out super well from just looking at them in person.  Turns out that while these are acceptable, cameras are not acrylic paint's friend.  Every single flaw, molecule of paint out of place really shows, which is why I re-did this whole mani from scratch after looking at my first round of pictures.  My recommendation is to totally try this design - it's easy enough and looks fabulous - but just go slow and be as careful as you can.  If you're going to take pictures, that is :)


Review: OPI DS Lapis in a Starry Night Sky

I'm not really one for New Years Resolutions.  I like to have as little commitments as possible, generally speaking.  If I were to have one, it would be to get better at freehand acrylic painting.  I think it's pretty safe to say I've mastered glitter so I really should try to improve in other areas.  I saw an amazing mani over at Lucy's Stash that had white acrylic stars painted over OPI DS Lapis so I decided that it would be a good place to start.  

I followed Lucy pretty much exactly here.  Two coats of OPI DS Lapis followed by a coat of Seche Vite.  I dug out my acrylic white paint and got to work.  Here's the tricky part.  It is really really hard to find brushes small enough to do fine detail work.  Even if you do have a small brush, you will have to trim off most of the bristles.  Like, down to almost nothing.  This is actually my second attempt at this because even though I thought I had a fine brush and smooth lines, as soon as you review the photos it is not that.  What I did find though was that because you're using paint over top coat, you can use a toothpick to remove excess paint.  Thus, I did an acrylic mani I don't hate to look at!


The Verdict:  I think like most people I like DS Lapis so much more shiny.  It has an interesting texture but the silver glitter just comes out so much stronger with a top coat.  I'm so happy I don't hate this in macro mode too.  Yay!  Thanks goes to Lucy for the design :)

Wednesday, January 14, 2015

Silver Checkerboard Sparkly Nails!

Ohhh yeah everybody, IT'S ACTUALLY NEW CONTENT.  I'm finding it really hard to go to work, sleep, do my nails AND take the pictures.  I'm actually also working on a super secret new project too that you might be interested in so there's that too.  So I do what I can.  What I can do right now is checkerboard nails! Yeah! Wooooo!

Nothing too fancy this time.  I even timed it, it only takes five minutes a nail!  You have five minutes for sparklies, right?? Yeah so I started with the usual, two coats of OPI Road House Blues then liberally applied my cheap top coat.  Starting in a zig-zag down the middle of my nail, I built out my checkerboard.  Use little scissors to cut the corner pieces to fit.  Bam, easy sparklies - if you can be careful with your placement. 


The Verdict: I'm actually trying to make an Instagram video tutorial to go with this.  You should follow me @polishallthenails .  It's a lot easier for me to take silly photos on there and repost my older content than, you know, make new stuff :D.  But sparklies!
XXX