Showing posts with label nail decals. Show all posts

Friday, January 16, 2015

Sometimes Subtle is Too Subtle

You might notice I've been a little light on the posts lately.  I have a good reason!  Recently I was contacted by an agency in New York that wanted me to help them make content for Revlon's new Tumblr!  Of course I was going to say yes.  My first entry went up last week and I'm quite proud of it.  As a side note, I wouldn't totally hate it if you liked it on Tumblr, because I like winning, even if it isn't a competition.  THIS WILL BE THE ONLY TIME I ASK THIS, I SWEAR.  Anyway, that hasn't been leaving me a ton of time to do complicated things so it's down to whatever strikes me at the time.  In this case it was an attempt at a black-on-black texture thing with Ozotic 623.


You can kinda see what I was getting at here.  I started with two coats of Rimmel Black Satin and once it was dry I cracked out my zig-zag decals and added a coat of 623 to my thumb and ring fingers.  The other three nails got tape for a triangle half-moon.  I love the texture in 623, it looks like granite, which is totally cool with me.  It just doesn't really show up over black.  Which makes sense because it's black too... oh well.  I could tell there was something other than just black going on here, which is what counts.  


The Verdict: Always love Ozotic polishes, they're either ridiculously holographic or interesting in the texture.  And I really like the decals from Sticky Nails.  I get bored with just one colour of polish so I like to throw in a bit of zig-zags in there.  Just remember to stick it to your palm first, kids, otherwise you'll have a bad time.  Tumblr! Words.

Nail decals were sent to me for my honest review.  I really like them :)

Thursday, January 15, 2015

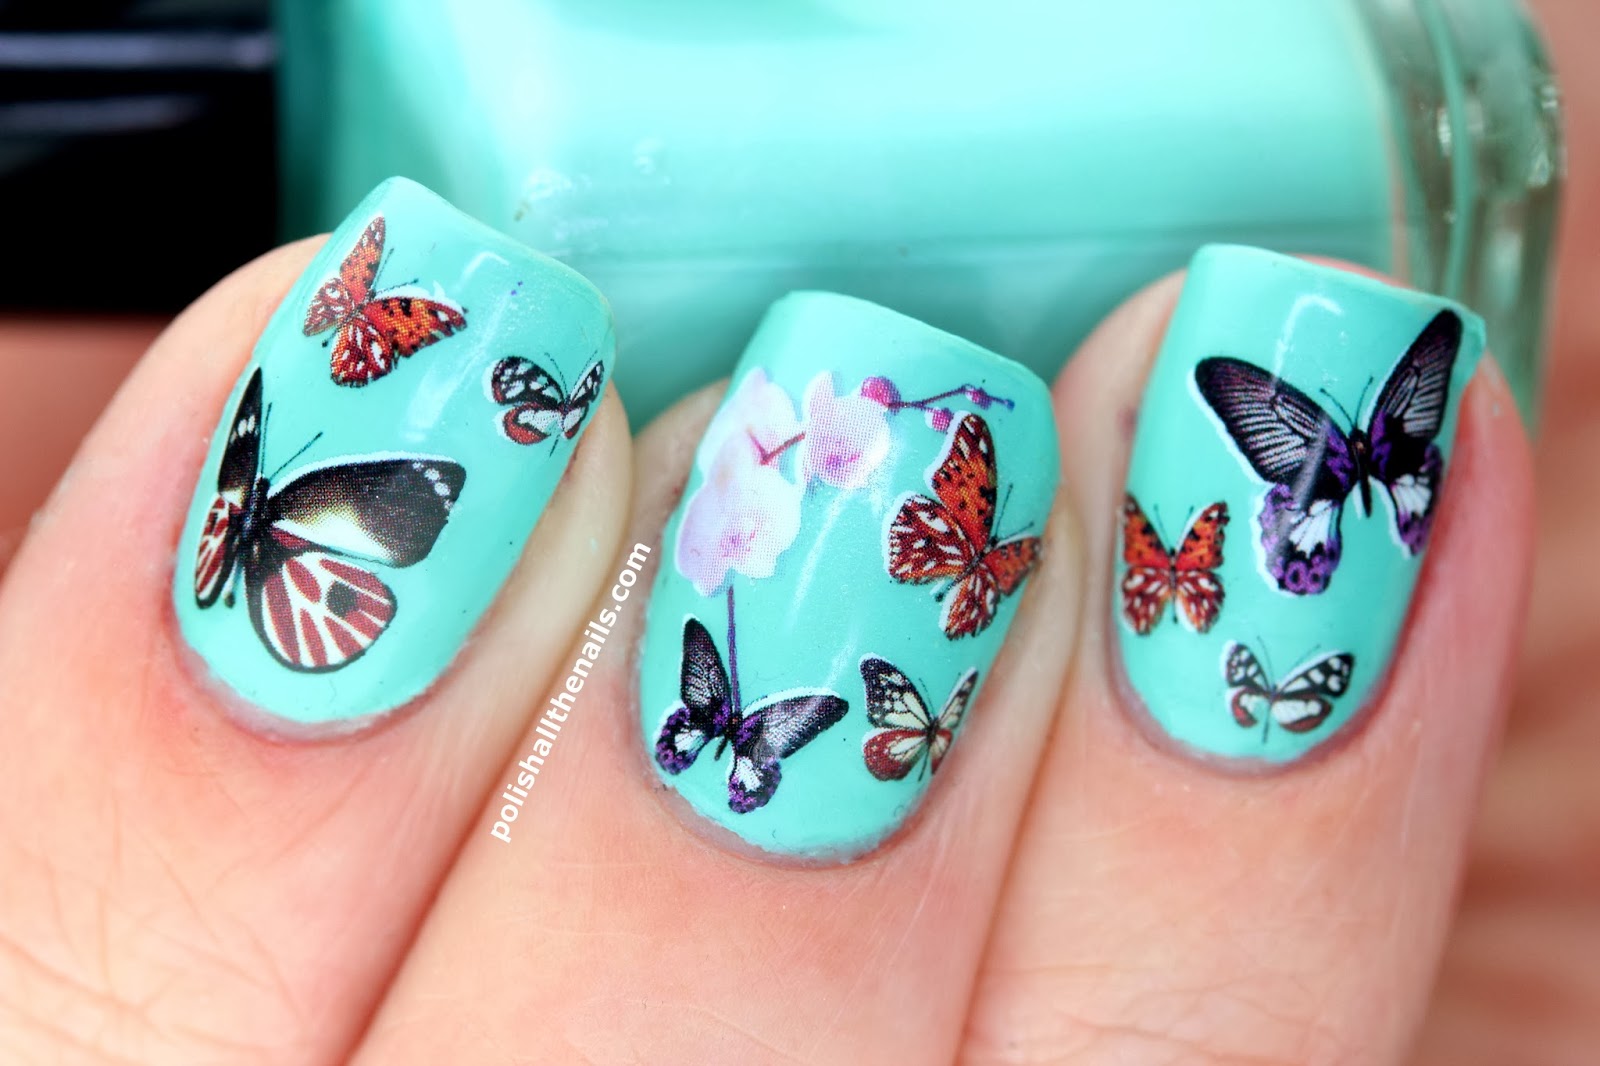
Ciate Pepperminty with Butterfly Water Decals!

Ok so it was a good thought but yeah every day is hard.  Let's go with "more", shall we?  I'm also going with trying to use all the stuff I order off the internet.  I found these butterfly water decals so those!  Needed a nice pastel colour to put them on, so Ciate Pepperminty was a good candidate.  Let's flutter by these butterflies, shall we?

Ciaté Pepperminty is a nice pastel blue/green creme.  It does need three coats to be properly opaque but it's fine with those three coats.  To help speed up the drying process, I added a coat of Seche Vite before moving on to my water decal.  Now, something important here.  WATER DECALS ARE NOT LIKE TEMPORARY TATTOOS.  DO NOT STICK THEM FACE DOWN.  Instead, sit them decal-up on a saturated cotton pad then use tweezers to slide the decal off.  I learnt this the hard way.  I don't mind though as they have a strong white backing, meaning you get really vibrant images.  Cover them with another coat of top coat and you're done! 


The Verdict:  Love the flutterbies, the decals themselves, and the polish.  Win all round!  I'm always happy when I can get a composition to look good, even if it's just sticking a bunch of decals on my nails.  Composition has never been my strong suit so if it can look cool then I feel cool.  YEAH.  Butterflies.

Wednesday, January 14, 2015

Dinosaur Nails over Ninja Polish 100% Colombian!

Laura is a happy Laura cos Laura has shiny dinosaur nails!  Woo!  I have fought long and hard with these metal whatevers and I finally defeated them.  Which means I get dinosaur nails!  They're even better when they're paired with a sparkly multichrome polish, even if it is brown.  Rawr, I'm a Laurasaurus :D 

There's quite a process to get these nails because these metal decals are thin and surprisingly sharp.  I will warn you now that unless they are fully covered in at least two coats of top coat, you are at risk of scratching yourself.  So, I wanted quite a thick base for these dinos so I could press them down as I applied them.  I started with one coat of OPI Here Today, Aragon Tomorrow and then applied two coats of the stunning Ninja Polish 100% Colombian.  I have no idea if this polish is still available but if you can get a hold of it somehow, damn, the red-orange-green shift in the brown base is amazing.  So shiny.  I then went with the usual top coat application but I took the step of curving each of the decals before applying them.  I found the best way was to lay it face down on my finger then roll and orange stick over it until the curve matched my nail.  I placed my columns and finished off with two thick coats of Seche Vite.  More is better here, trust me.


The Verdict:  I LOVE how these came out.  I have quite a few different styles of these metal decals and haven't been able to get them to sit flat enough until now.  Curving them made such a difference.  I maaaay be officially obsessed with these now :D

XXX